Open topic with navigation
Adding and Editing Blocks
M3602A Different IPs
- Built-in blocks:
- User blocks
- External Blocks
- Vivado blocks
- FPGA block
Built-In Blocks
When a hardware project is opened, both the hardware and library can be seen, blocks and ports that are available for the particular hardware module. These blocks and ports can be selected, dragged into the project, configured, and connected to other blocks in the project.
- For example:

- The selected block can now be (1) configured and (2) saved.
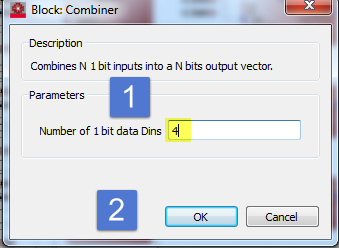
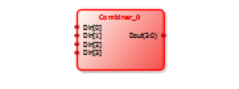
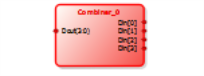
- Notice there are now only four data lines as opposed to the previous eight data lines that came as the default value.
- When a block is selected and right-click the block, the following options are available:
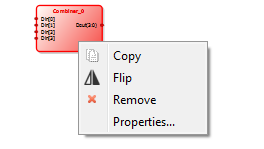
- Copy allows making a copy of this block.
- Remove deletes the block from the project.
- Properties... provides the configuration dialog box shown above.
- Selecting "Flip" will drive the following action:
Library Ports (FPGA Block Project)
To import Hardware Ports, Blocks, and Library Blocks, see M3602A Basics.htm
Adding User Blocks
External Blocks
To import Hardware Ports, Blocks, and Library Blocks, see Importing User IPs
Vivado Blocks
To import Hardware Ports, Blocks, and Library Blocks, see Importing Vivado IPs
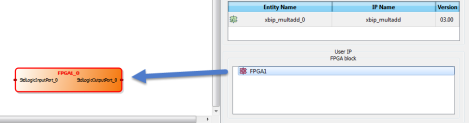
Adding an FPGA Block
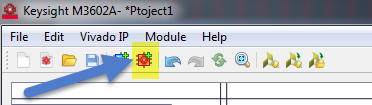
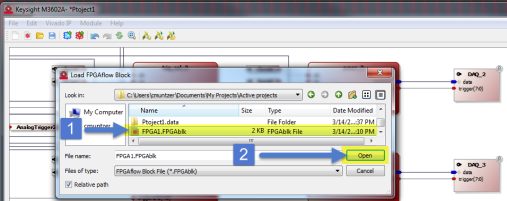
To add an FPGA Block, do the following:
- Click on the Adding an FPGA block
 icon
icon
- Navigate to, select and open the desired FPGA block.
- Notice the selected block appears in the User IP FPGA block area of the project, where it can be selected and dragged into the project window. Once there, it can be connected to other project ports and blocks.